Not for techies: NFTs for everyone–Pt. 3
You’ve reached the finish line! Part 3/3. In the final installment of his 3-part series, Roberto Cano explains how to list an NFT for sale on the mainnet OpenSea platform using a smart contract.
Here we are again, my experienced developer! We are on the final stretch of our road to the NFT world. This is the third and final installment of our NFT series. If you don’t know what I’m talking about, you can check the first two parts of the series here and here.
In this series of three articles, we are exploring the intricacies of the blockchain and smart contract development by creating our own NFT–but fear not! The series strives to be approachable by non-techies. If you consider yourself one of them, or if you’re a techie, but have never touched anything blockchain related, you’re in the right place!
Our journey is bringing us to the following exciting places:
- First Gear (see part 1)
- ERC721, the secret identity of an NFT
- Remix IDE, or how to deploy an NFT directly from your browser
- Niftie!, your very first baby NFT
- Second Gear
- Rinkeby, the gas-saver god that will allow you to test your NFT without spending a penny
- IPFS, the Interplanetary File System that will skyrocket your art piece
- Hitting a Pinata, or how to make your art stick hard and not get lost
- Sailing with your NFT into the OpenSea (and not getting stranded)
- Full Throttle
- Floating high with the OpenZeppelin while avoiding the Hindenburg effect
- NFT for real: going full Main…net and living the dream life
We’ve already been through First and Second Gear. Now, we are on our way to the moon and will engage the full throttle, flying high with the help of our zeppelin, and finding our place among the stars. Let’s go!
Disclaimer
This guide assumes that you already know a bit about Ethereum. You should at least have a functioning wallet and your wallet address at hand. If you don’t, you can install Metamask by following this article:
https://metamask.zendesk.com/hc/en-us/articles/360015489531-Getting-started-with-MetaMask
Full Throttle
I can’t believe that we’re almost there! In the last article, we learned how to add some art to our little Niftie and how to list it on OpenSea–but that was just a test. Now, we want to go all the way and list our Niftie on the real OpenSea. By the end of this article, you will have a real NFT on the real OpenSea that can earn you some real money!
In order to list Niftie in OpenSea, we will need it to have two additional properties:
- We need to be able to approve OpenSea as an operator of Niftie. This means that OpenSea will be able to sell our NFT on our behalf.
- Niftie must be transferable, meaning that it can have a new owner–the buyer.
Wow, that sounds like a lot! It is a bit more work, but the results will be amazing. So, how can we do this? How does a transferable NFT look, and how do you approve OpenSea to sell it?
We are going to lean on one of the most famous libraries out there for smart contracts development–one that is fueled by hot air.
OpenZeppelin
Welcome to the world of the future-past, where a zeppelin will pave our way into the universe of the blockchain. OpenZeppelin is an amazing library for smart contracts. What is a library? Is it a collection of books? Well, almost! For our purposes, a library is a collection of functionalities and standards that you can leverage to write your code by reusing what others have already written and tested.
In the case of OpenZeppelin, the library has a focus on ease of use and security. This means that by using it, you immediately raise the bar for your contracts to be more secure and safe.
It has plenty of functionalities like:
- ERC20 tokens, or what you likely know as cryptocurrency
- ERC721 tokens, commonly known as NFTs
- Access control for smart contracts
- Upgradeable contracts
- And more!
In this case, we are interested in the ERC721 part of OpenZeppelin. We will use it to understand which functions we must implement. We are going to use the ERC721 interface from OpenZeppelin. In programming, an interface is a file that tells you the kind of functionality that a program must offer. In the case of a smart contract, it tells you the set of functions that the smart contract must implement.
Have a look at the IERC721.sol file directly from OpenZeppelin repositories here: IERC721.sol
Inside the declaration of the interface:

It declares a set of events… (comments have been removed here for readability):

…and then a set of functions (same, comments have been removed here):
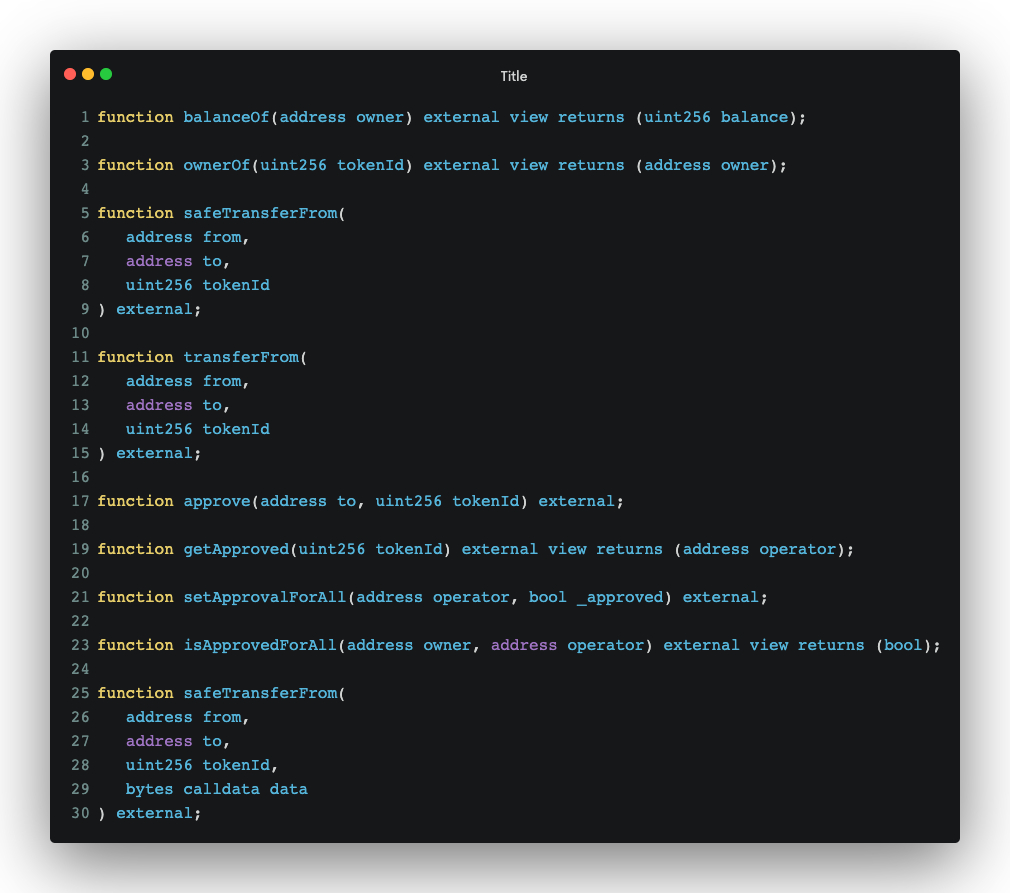
If you look at the events, you will recognize the Transfer event that we’ve already implemented in our Niftie, plus two other events. We will go over all the events and functions, but first, let’s tell Niftie that we want it to implement the IERC721.sol interface.
First, we import the corresponding file from OpenZeppelin:

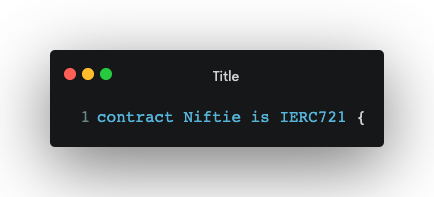
Then, we tell Niftie that it is an IERC721.sol contract:
The moment you do this, RemixIDE will start complaining about a bunch of errors. Do not worry, we will address those in a moment.

The events
The first batch of errors comes from the Transfer event. Remember when we said that we had already defined it? Well, Remix is telling us that it’s defined twice, so we need to remove our definition and use the one that comes with the OpenZeppelin library. Just remove the following line:

Then, we need to implement all the functions that the IERC721.sol interface requires. Let’s go one by one.
The functions
balanceOf
The first function we will implement is balanceOf. This function tells others how many NFTs a particular wallet owns. In our case, the owner of the NFT only owns 1 NFT, which is Niftie. We need to compare the address that we receive in the function with the current owner of the NFT, and if they are equal, we set the balance to 1.

The definition of the function balanceOf is directly copied from the OpenZeppelin interface. This is typical when using interfaces. You copy the definition and then fill in the implementation according to your needs. The only difference is the use of the keyword override. This tells the compiler that you are overriding the functionality of that particular function with your own logic.
ownerOf
The next one in the interface is ownerOf. However, if you recall, we had a variable called ownerOf, and we set it to our own wallet. In certain cases, Solidity allows defining a variable that acts as a function. So, by defining the ownerOf variable, we’ve already implemented the ownerOf functionality, and we can skip this bit.
approve, getApproved
Let’s skip transferFrom and safeTransferFrom for now, as they will rely on what we are about to do. We need to implement the approval functionality. This approval functionality is used by OpenSea, so it can sell the NFTs on our behalf. Otherwise, we would need to communicate with the buyer the moment they want to buy our NFT, so we could transfer it to them. With approvals, we allow OpenSea to transfer the NFT for us.
There are two flavors of approval. One approves one token at a time, indicating the tokenId. This is the approve function. To implement this approve function, we will need to store the address of the operator that we are approving to do the selling on our behalf. First, we want to define a new variable:
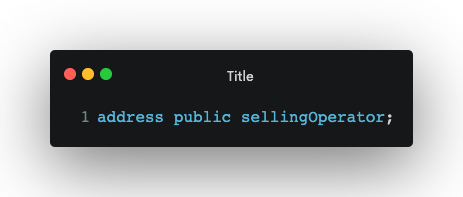
Remember to add it right after the tokenURI variable.
This time, because the two approval functions (approve and setApprovalForAll) have very similar functionalities, we will implement a utility function. This function will implement the required functionality, and we will call it from the other two functions. Let’s call this new function internalApprove.
This internalApprove will first check if the caller of the function is the owner of the NFT–in this case, your own wallet. In Solidity, you can require certain things to be true before the function executes. To do this, you use the keyword require. This is how it looks:
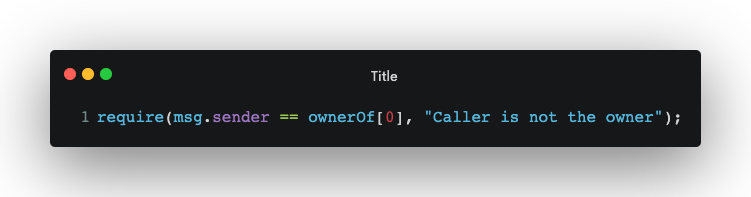
It requires that the wallet calling of the function (msg.sender) is the owner of the NFT, because only the owner can give approvals. If it is not the case, it will show the message “Caller is not the owner”, and the function will stop executing and return an error.
It will require that the approved token is the tokenID 0:

If those two conditions are true, we set the selling operator to the indicated one, passed to the function, which in the case of OpenSea is the OpenSea address itself. The whole function looks like this:

Notice that at the end of the function definition, it says internal. This tells the compiler that the function can only be called from other functions inside the contract, but never from an external caller.
Now it is time to implement the public function, approve. It will call the internal one and then emit an event to notify everybody of the approval:
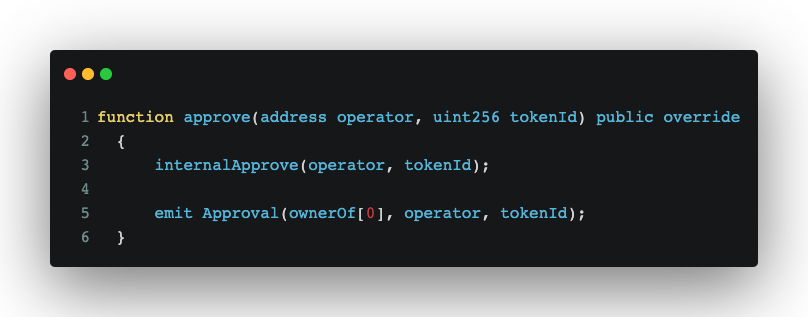
If the require function checks in internalApprove fail, the function will stop executing, and the event will never be emitted.
What about getApproved? This is just a convenience function to ask for the sellingOperator of a specific tokenId. In our case, if the tokenId is 0, we return sellingOperator:
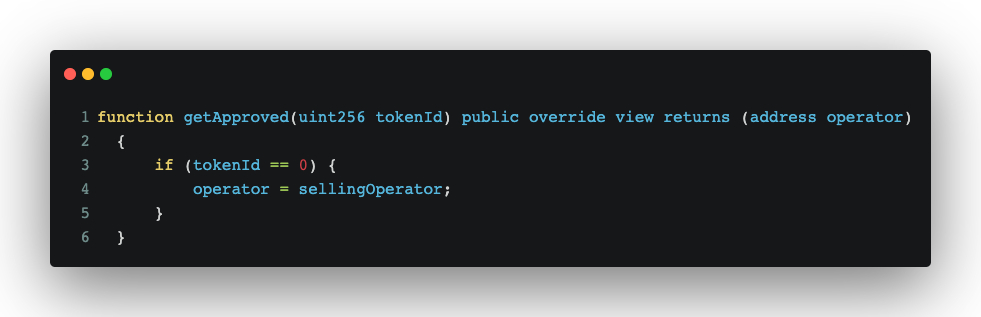
We’re getting closer! Now onto the other set of approval functions.
setApprovalForAll, isApprovedFor all
These have the same functionality as the previous functions, but they approve all available tokens to the given operator. Because we only have one NFT, they are very similar to the previous ones. The only difference is that setApprovalForAll receives a flag indicating whether the operator is being approved (approved=true) or disapproved (approved=false). If it is true, we just need to call internalApprove with the given operator. If it is false, then we call internalApprove with the zero address. This special address is not owned by anybody, and it indicates that there is no approved operator.
After calling internalApprove, we emit an event to notify that the approval for all has been successful:

transferFrom and safeTransferFrom
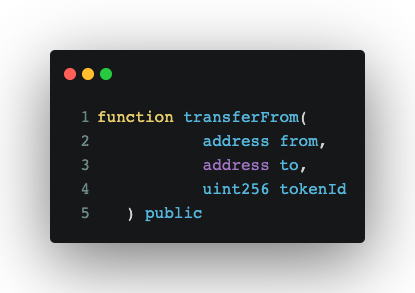
Now we can come back to safeTransferFrom and transferFrom. There is also one function at the end that is called safeTransferFrom, but it receives different parameters. These different functions have different purposes that we will not address here. In any case, we just want Niftie to be transferred to a new owner. We will do this in the transferFrom function, and then we will have the other two functions called transferFrom to implement the same functionality. The function is defined like this:

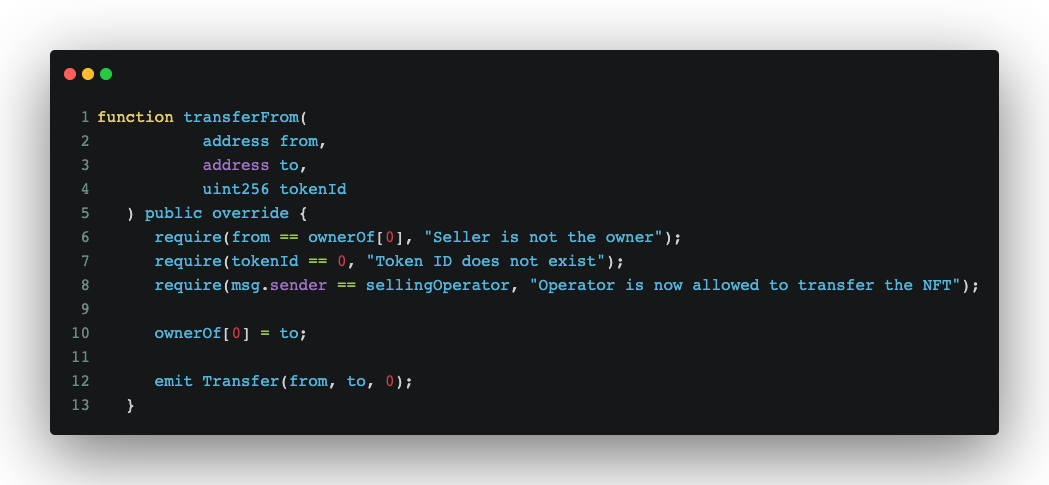
The function transfers the NFT with the indicated tokenId from an address to a new address. To implement the transfer of the NFT, we first need to make sure that the transfer is valid. For example, we must ensure that the from address is the current owner of the NFT, and that the NFT being transferred is the token ID 0. We will use require again for this:
One more check needs to be done. Remember that we approved OpenSea to transfer the NFT on our behalf? We must make sure that the caller of the transferFrom function is the approved operator:

If all is correct, we can finally change the owner of the NFT to the new address and emit an event to notify everybody. This is what the whole function looks like:
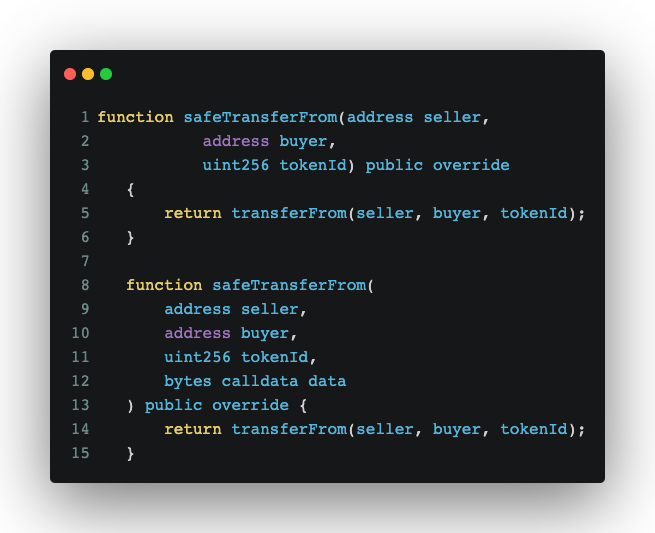
Then, we can implement the safeTransferFrom functions by calling transferFrom:
IERC721 Wrap-Up
Well done! Now you have a fully functioning and sellable NFT! This is the full code for reference:
It comes the time to fly high and be among the stars. It’s the moment you’ve been awaiting for so long! We are finally going Main…net!
Mainnet Deployment
Here we go! The first thing you will need, of course, is proper Ether. Remember, we got some Rinkeby Ether in the previous articles so that we could play around in a Tesnet. Now it’s time to spend real money (only if you want to, of course!) Make sure you have enough funds in your wallet. I’d recommend at least 0.2 ETH, but it will depend on the state of the network and the price of the gas. First of all, make sure you can deploy the contract on Rinkeby again, and list it on the testnet OpenSea, like we learned in the previous article. If everything went well, let’s go for Mainnet! I suggest you read the following part first without following along to understand what you need to do. Specifically, read the section about the gas price, so you understand when the best moment for you to deploy to Mainnet is.
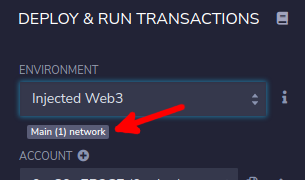
In Metamask, change the selected network to Ethereum Mainnet:

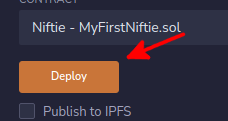
Now in RemixIDE, make sure that Mainnet is also selected:
If all is correct, let’s click Deploy:
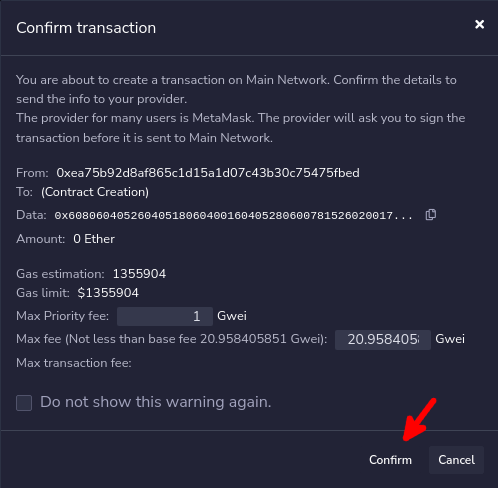
This will trigger the Mainnet deployment, and Remix will ask you for confirmation to make sure you are not deploying to Mainnet by mistake. Check that the From address is your wallet address. The Gas estimation field should be fairly similar to the one in the screenshot, as it depends on the amount of code our contract has. Once you are ready, click on the Confirm button:
Then Metamask will ask you for confirmation. Check that it is deploying to Ethereum Mainnet, and the type of operation is Contract Deployment:

Finally, check the price you are going to pay. This will depend on the price of the gas at the moment of deployment. Gas price is the amount of money you pay when you operate on Ethereum. It is the price of each unit of gas. Do you remember the Gas estimation field on the Remix confirmation screen? It tells you how much gas you need to deploy. If you multiply this by the gas price, you get the final amount you will pay for deployment. As a reference, on the screenshot below, the gas price was around 20 gwei:
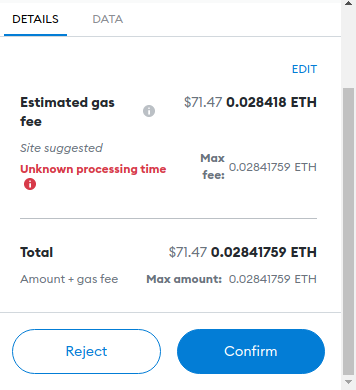
If you want to check the current gas price, you can go to https://ethgasstation.info/ and check for the Standard gas price:

For example, if you see 40 gwei, it means you would pay double the amount. Instead of $71.47, it would be around $140. Check the price, and choose the best moment for it. For Europe, this is typically around 8am CEST (11pm PST in the US).
If you’re ready, you can finally hit Confirm on Metamask:

The transaction will be sent. It may take a while to be processed, particularly when the gas price is low (it took eight minutes for me), so be patient. You can check the Activity tab on Metamask to confirm that the transaction is pending:

Once processed, your awesome NFT is on the real Ethereum! Go back to Remix, and you will see the newly deployed contract there. Copy the address, because you will need it for the next step:
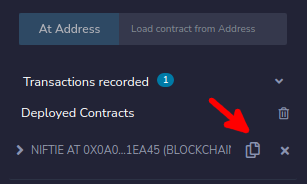
Congrats! Now let’s go list it on OpenSea.
OpenSea Listing
This time, go to the real OpenSea at https://opensea.io/get-listed/step-two, where you will see the familiar screen:

Paste your newly created contract address, and click Submit. You should see your NFT on OpenSea!

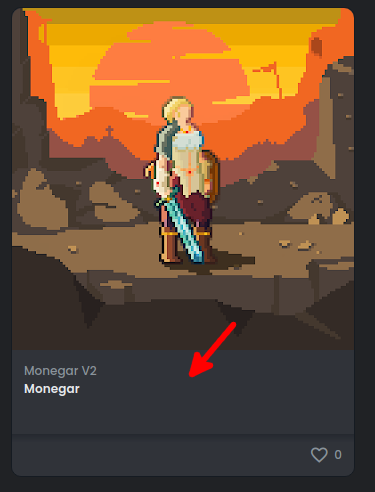
I created this amazing PixelArt piece for this occasion, and now we’re going to sell it! First, make sure to connect to your wallet on OpenSea:


Once connected, click on the NFT itself to enter the listing page:
Click on Sell to start the listing process:
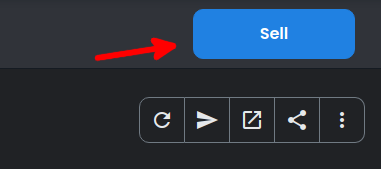
Input the Amount you want to sell your NFT for, and configure any other options, if you wish. You only need to input the amount to continue the process:

Click on Complete Listing:

You will need to initialize your wallet for the listing. This initialization is only done once. Then, you can list as many NFTs as you want on OpenSea. First, you will see this screen:

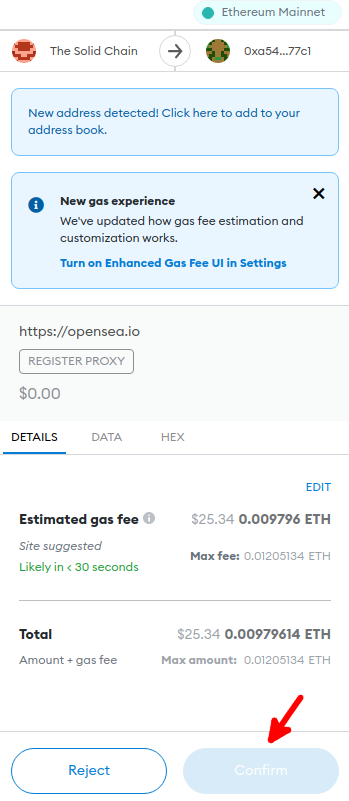
Metamask will open for you to confirm the wallet initialization. This has a cost. Again, try to find a moment when the gas is cheap, so you don’t overpay:
After you’ve registered your wallet with OpenSea, you will need to approve OpenSea as an operator for your NFT. Remember the setApprovalForAll function we added to our contract? OpenSea will now call it to set itself as the operator:
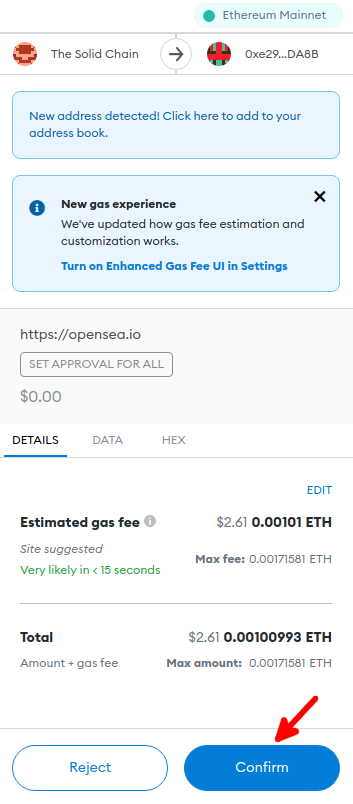
As you can see in the middle of the screenshot, it indicates that it is calling SET APPROVAL FOR ALL. The price should be cheap for this one, as it is a very small function. This is the last payment you will have to make. Once the transaction is processed, the item is approved for sale:

Right after that, OpenSea will ask you to approve the listing. Metamask will pop up again and ask you to sign it. This won’t cost you anything.

Click on Sign, and after it finishes, you should see this wonderful screen:
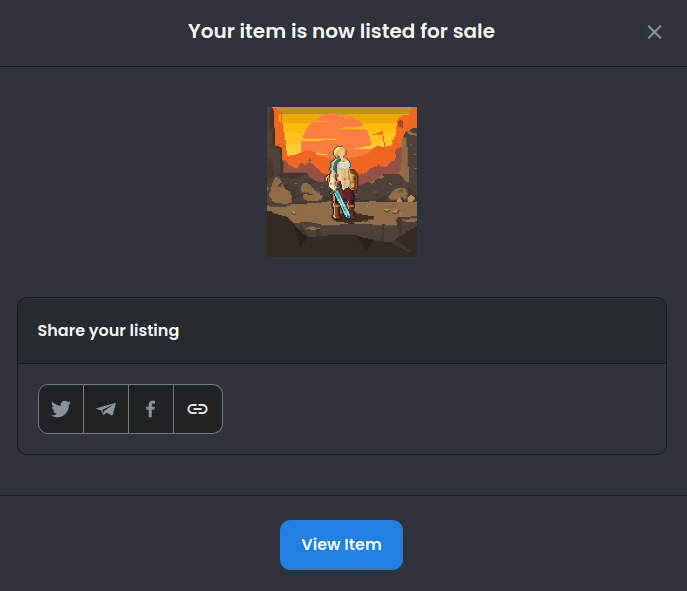
Now your item is listed for sale! Now, you can lean back and watch how your item sells!
That’s it. We’ve come to the end of our amazing journey! It’s been quite an adventure. Let’s remember what we’ve done so far:
- Using RemixIDE, we’ve created an NFT contract.
- Using Pinata, we’ve uploaded our art to IPFS.
- Using Rinkeby, we’ve tested that our contract works on the OpenSea testnet site.
- We’ve deployed our contract to Mainnet.
- We’ve gone to OpenSea Mainnet and added our NFT to the system.
- Finally, we listed our NFT on OpenSea!
Congratulations! I’m glad you made it to the end. Our little Niftie has graduated with honors and can live a long and prosperous life. Now you know more about blockchain development, NFTs, and OpenSea.
If you want to continue learning about blockchain development, I’ll be writing a series of articles on my personal blog about how to kickstart your blockchain career. Make sure to check it out at https://medium.com/@thesolidchain!
See you soon, my advanced developer! Keep it up!
Roberto Cano is one of the many talented developers available to hire on the Gun.io platform. Check out his profile, or head over to his personal website, thesolidchain.com.
Interested in working with Roberto or one of our other amazing devs on Gun.io? We specialize in helping engineers hire (and get hired by) the best minds in software development.